Integration setup
The following article guides you through the Coupa integration setup. It consists of two mandatory parts: Coupa configuration and Rossum hook configuration.
Configuring Coupa
The main prerequisite is to have a valid Coupa user with needed permissions (see OAuth 2.0 scopes). If you don't have a user with needed permission, ask your admin to create it.
You can always (also) check the official documentation OAuth 2.0 Getting Started with Coupa API
- Login to the Coupa web admin at URL
https://[example-company].coupacloud.com - Go to the Setup, search for keyword
oauthand click the one result OAuth2/OpenID Connect Clients

- Create a new Client and make sure that you have selected a Grant type with
Client Credentialsoption and save it.
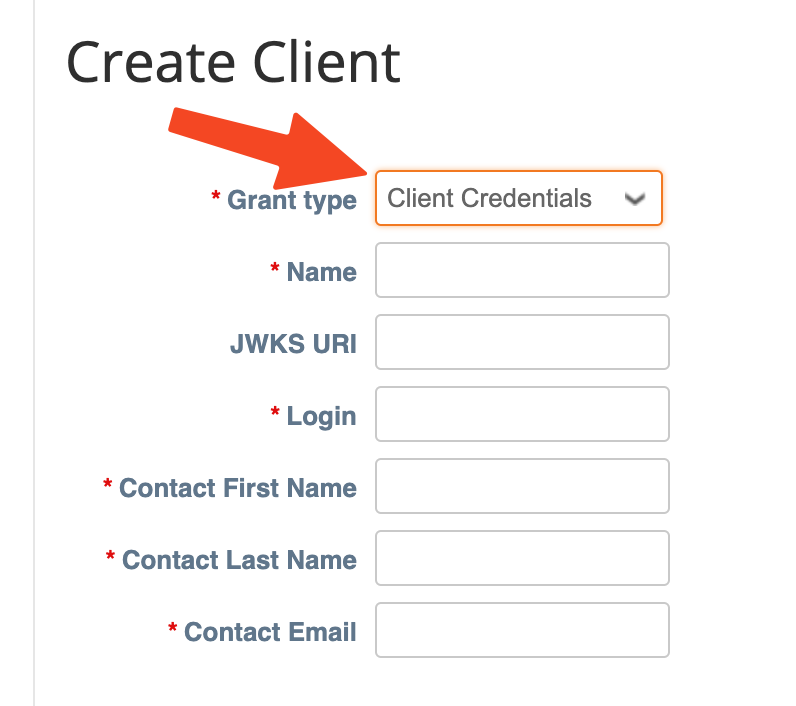
- Find the user prepared for the integration and note the values
IdentifierandSecrets. You will need it for every hook setup later
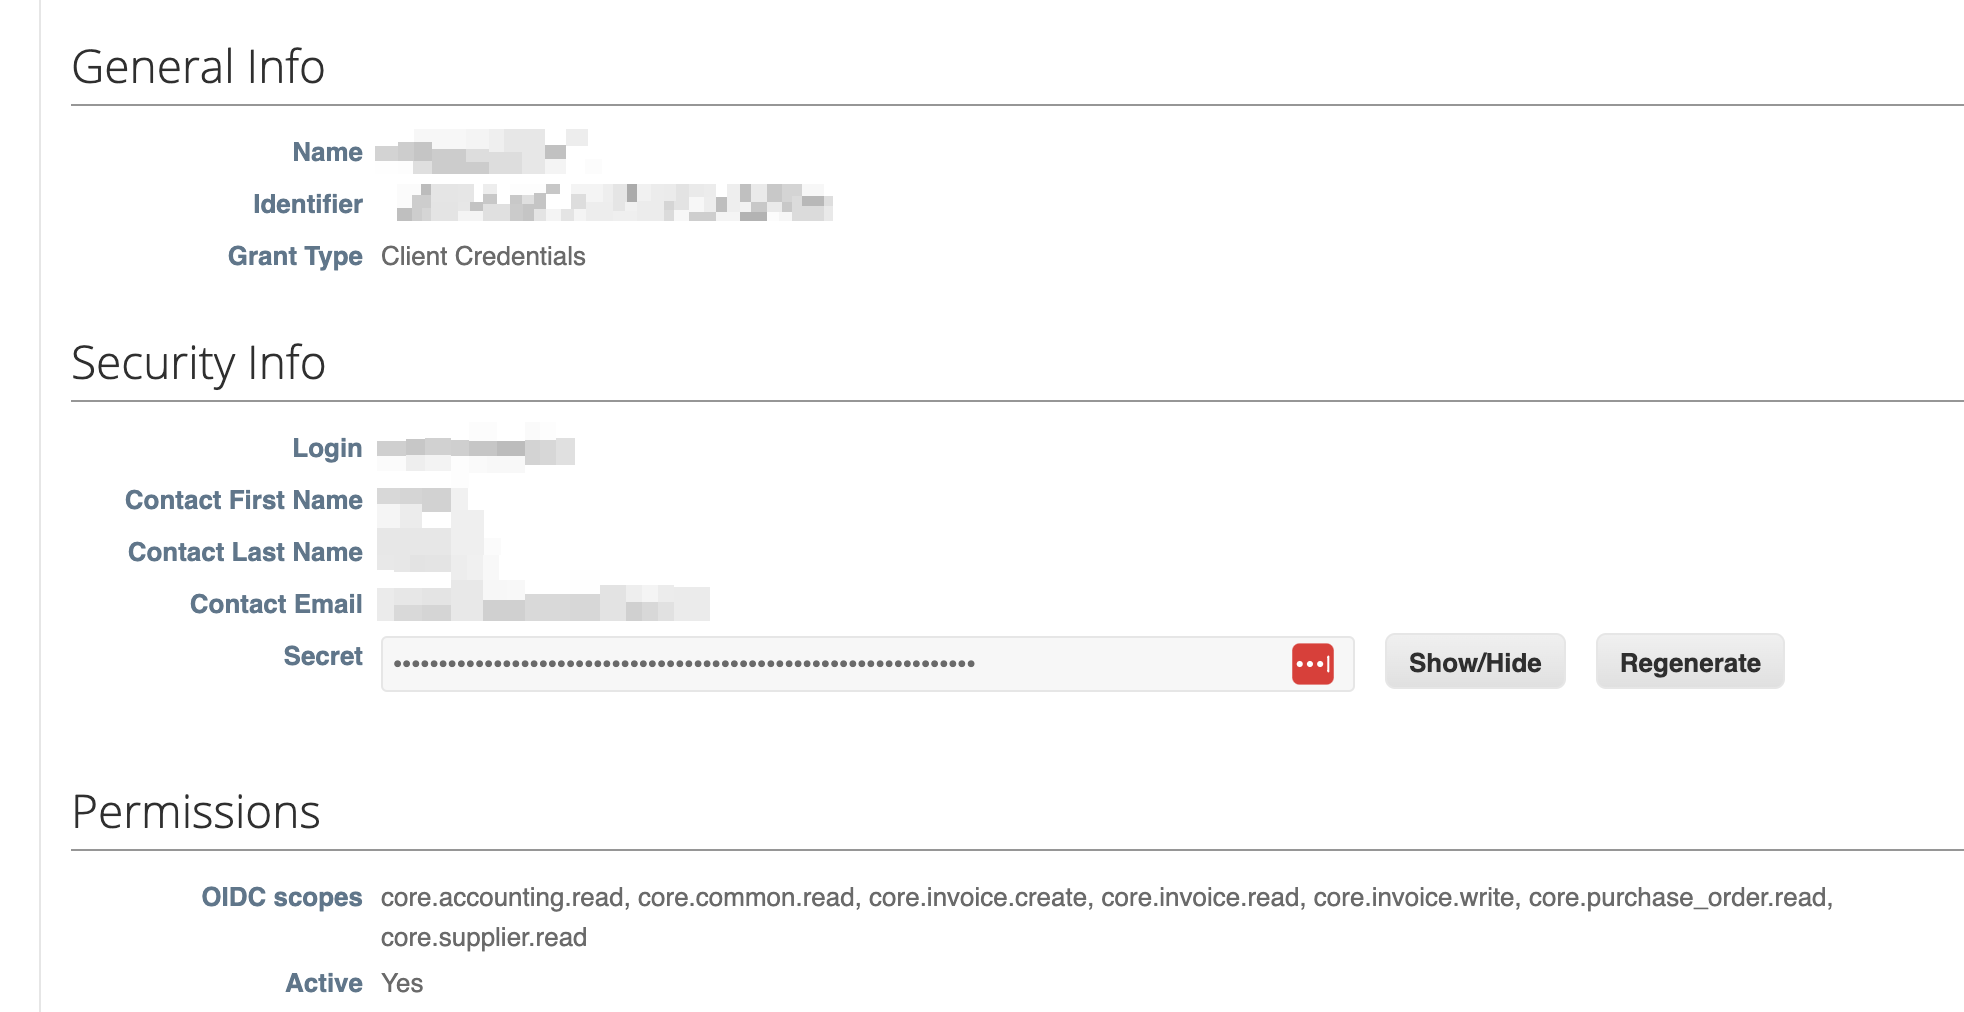
- For start, these scopes should work for basic integration
core.accounting.read, core.common.read, core.invoice.create, core.invoice.read, core.invoice.write, core.purchase_order.read, core.supplier.read- you can copy and paste it exactly like this when using the Postman collection provided by Coupa
Configuring Rossum
Coupa service (integration) is provided by Rossum.ai in the form of webhook. To start using Coupa (either imports or exports), follow these steps:
Webhook in UI
- Login to your Rossum account.
- Navigate to Extensions → My extensions.
- Click on Create extension.
- Set the following fields:
- Name:
Coupa: Import/Export [what] - Trigger events:
Manual(later alsoScheduled) - Extension type:
Webhook - URL (see Import configuration and Export configuration)
- Token owner of the extension (typically a system user)
- Name:
- Click Create the webhook.
- Fill
Configuration(see Import configuration examples or Export configuration examples) - Fill
Secretsfields.
Setting hook secrets schema (optional):
Optional step is it cannot be done via UI (but can be done either via API or via prd deployment tool)
{
  "type": "object",
  "properties": {
    "client_secret": {
      "type": "string",
      "minLength": 1,
      "description": "API OAuth Client secret"
    }
  },
  "additionalProperties": false
}
As a result of this change, it is easier to update the hook secrets (and to know what is in the secrets). You will see the following value in the hook secrets that can be easily modified:
{
  "client_secret": "__change_me__"
}
Initial test
You can invoke the webhook manually using curl (for example):
curl --location --request POST 'https://[company-example].rossum.app/api/v1/hooks/[hook-id]/invoke' \
--header 'Authorization: token [token]' \
--data ''
Then go to the Rossum Extension Logs and observe the content
Available configuration options
We're still working on this part and would love to hear your thoughts! Feel free to share your feedback or submit a pull request. Thank you! 🙏